 Nginx - 站点与认证
笔记
你一定看过很多的简易版下载网站并诞生出制作它的想法,也希望访问 Nginx 的时候,需要进行用户名和密码的验证。本内容将带大家学习如何利用 Nginx 制作下载站点以及访问 Nginx 的用户认证。
2021-11-29 @Young Kbt
# Nginx制作下载站点
首先我们先要清楚什么是下载站点?
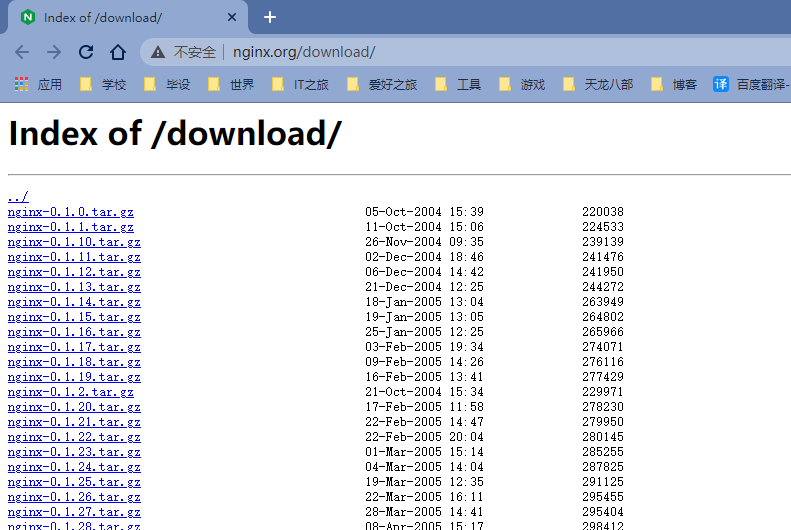
我们先来看一个网站 http://nginx.org/download/ (opens new window)
这个是大家去下载 Nginx 时经常访问的网站,该网站主要就是用来提供用户来下载相关资源的网站,就叫做下载网站。
如何制作一个下载站点:
- Nginx 使用的是模块
ngx_http_autoindex_module来实现的(自带),该模块处理以斜杠(『 / 』)结尾的请求,并生成目录列表。
- Nginx 编译的时候会自动加载该模块,但是该模块默认是关闭的,我们需要使用下来指令来完成对应的配置
# autoindex
autoindex 指令启用或禁用目录列表的输出
| 语法 | 默认值 | 位置 |
|---|---|---|
| autoindex <on | off>; | autoindex off; | http、server、location |
# autoindex_exact_size
autoindex_exact_size 指令对应 HTLM 格式,指定是否在目录列表展示文件的详细大小。
默认为 on,显示出文件的确切大小,单位是 bytes。
改为 off 后,显示出文件的大概大小,单位是 kB 或者 MB 或者 GB。
| 语法 | 默认值 | 位置 |
|---|---|---|
| autoindex_exact_size <on | off>; | autoindex_exact_size on; | http、server、location |
# autoindex_format
autoindex_format 指令设置目录列表的格式。
| 语法 | 默认值 | 位置 |
|---|---|---|
| autoindex_format <html | xml | json | jsonp>; | autoindex_format html; | http、server、location |
只有当 autoindex_format 指令设置为 html 时候,上方的 autoindex_exact_size 指令才会起作用。
注意
该指令在 1.7.9 及以后版本中出现。
2021-11-29 @Young Kbt
# autoindex_localtime
autoindex_localtime 指令对应 HTML 格式,是否在目录列表上显示时间。
默认为 off,显示的文件时间为 GMT 时间。
改为 on 后,显示的文件时间为文件的服务器时间。
| 语法 | 默认值 | 位置 |
|---|---|---|
| autoindex_localtime <on |off>; | autoindex_localtime off; | http、server、location |
# 实现案例
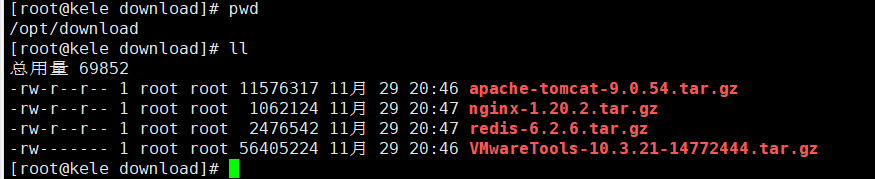
自行准备几个文件或者压缩包,我这里准备了 4 个用过的压缩包。
创建一个目录,将压缩包放入其中,我这里创建的路径是
/opt/downloadmkdir /opt/download1然后把压缩包都放到该目录下
效果如图:
打开 Nginx 的配置文件
vim /usr/local/nginx/conf/nginx.conf1添加配置如下内容:
location /download {
    root /opt;                # 下载目录所在的路径,location 后面的 /download 拼接到 /opt 后面
    # 以这些后缀的文件点击后为下载,注释掉则 txt 等文件是在网页打开并查看内容
    if ($request_filename ~* ^.*?\.(txt|doc|pdf|rar|gz|zip|docx|exe|xlsx|ppt|pptx|conf)$){
			  add_header Content-Disposition 'attachment;';
		  }
    autoindex on;			  # 启用目录列表的输出
    autoindex_exact_size on;  # 在目录列表展示文件的详细大小
    autoindex_format html;	  # 设置目录列表的格式为 html
    autoindex_localtime on;   # 目录列表上显示系统时间
}
1
2
3
4
5
6
7
8
9
10
11location /download { root /opt; if ($request_filename ~* ^.*?\.(txt|doc|pdf|rar|gz|zip|docx|exe|xlsx|ppt|pptx|conf)$){ add_header Content-Disposition 'attachment;'; } autoindex on; autoindex_exact_size on; autoindex_format html; autoindex_localtime on; }1
2
3
4
5
6
7
8
9
10
11// Make sure to add code blocks to your code group
注意
root 指令后面必须是下载路径,因为我的下载路径是
/opt/download,所以这里填写/opt,而 location 的/download会自动拼接到后面,形成完整的下载路径。2021-11-29 @Young Kbt
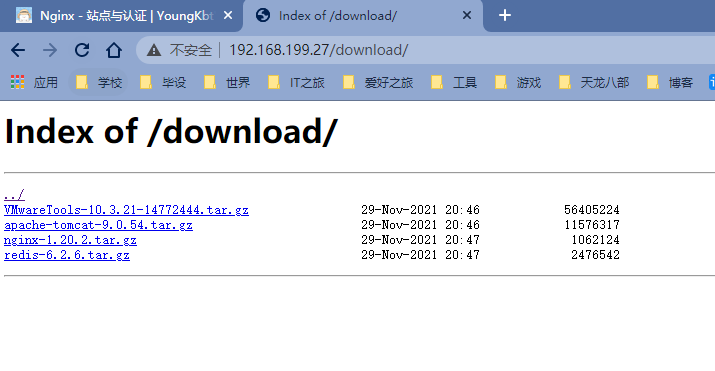
访问
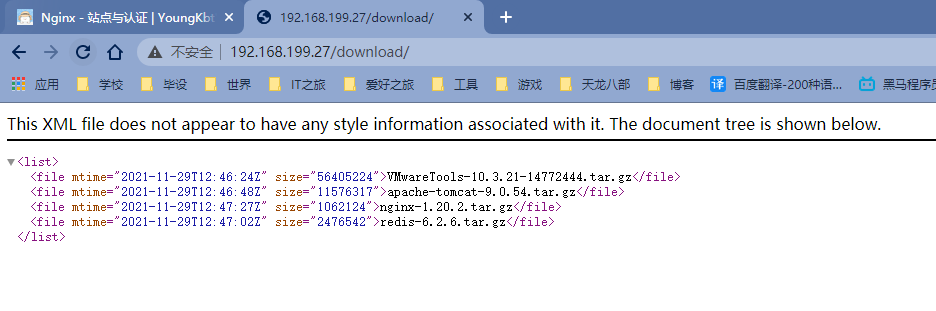
192.168.199.27/download效果如下:
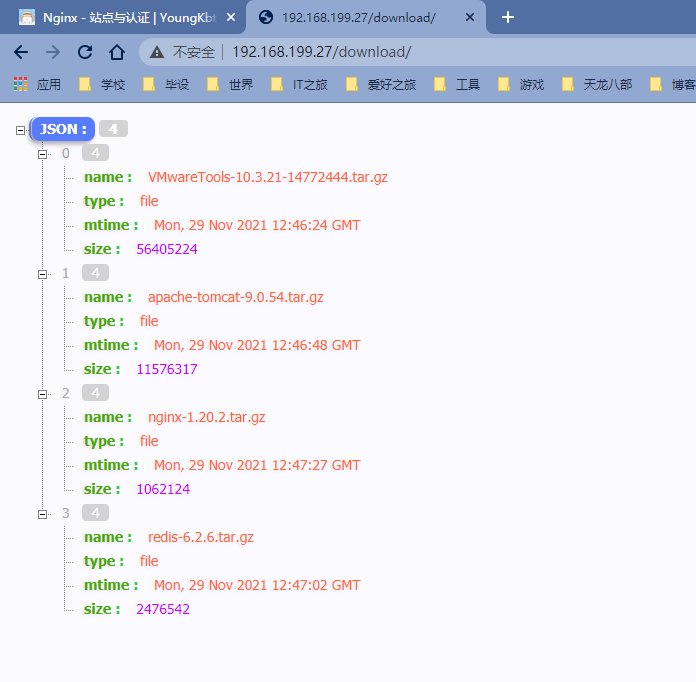
JSON 和 XML 格式如图:(一般不用这两种方式)
# Nginx用户认证模块
对应系统资源的访问,我们往往需要限制谁能访问,谁不能访问。这块就是我们通常所说的认证部分,认证需要做的就是根据用户输入的用户名和密码来判定用户是否为合法用户,如果是则放行访问,如果不是则拒绝访问。
Nginx 对应用户认证这块是通过 ngx_http_auth_basic_module 模块来实现的,它允许通过使用「HTTP基本身份验证」协议验证用户名和密码来限制对资源的访问。默认情况下 Nginx 是已经安装了该模块,如果不需要则使用 --without-http_auth_basic_module 删除认证模块。
该模块的指令比较简单。
# auth_basic
auth_basic 指令使用「HTTP基本身份验证」协议启用用户名和密码的验证。默认关闭。
| 语法 | 默认值 | 位置 |
|---|---|---|
| auth_basic <string | off>; | auth_basic off; | http、server、location、limit_except |
开启后,服务端会返回 401,指定的字符串会返回到客户端,给用户以提示信息,但是不同的浏览器对内容的展示不一致。
# auth_basic_user_file
auth_basic_user_file 指令指定用户名和密码所在文件,包括所在的路径。
| 语法 | 默认值 | 位置 |
|---|---|---|
| auth_basic_user_file <file>; | — | http、server、location、limit_except |
指定文件路径,该文件中设置用户名和密码,密码需要进行加密。可以采用工具自动生成。
# 实现案例
在配置文件 nginx.conf 添加如下内容:
location /download{
    # 下载站点知识
    root /opt;                # 下载目录所在的路径,location 后面的 /download 拼接到 /opt 后面
    autoindex on;			  # 启用目录列表的输出
    autoindex_exact_size on;  # 在目录列表展示文件的详细大小
    autoindex_format html;	  # 设置目录列表的格式为 html
    autoindex_localtime on;   # 目录列表上显示系统时间

    # 认证模块知识
    auth_basic 'please input your auth';   # 启用户名和密码的验证,并在请求头插入数据
    auth_basic_user_file /usr/local/nginx/conf/htpasswd;    # 存用户名和密码的文件路径
}
1
2
3
4
5
6
7
8
9
10
11
12location /download{ root /opt; autoindex on; autoindex_exact_size on; autoindex_format html; autoindex_localtime on; auth_basic 'please input your auth'; auth_basic_user_file htpasswd; }1
2
3
4
5
6
7
8
9
10
11
12// Make sure to add code blocks to your code group
我们需要使用
htpasswd工具生成包含用户名和密码的文件yum install -y httpd-tools1该工具基本操作指令如下:
htpasswd -c /usr/local/nginx/conf/htpasswd username   # 创建一个新文件记录用户名和密码,密码后面弹出输入
htpasswd -b /usr/local/nginx/conf/htpasswd username password   # 在指定文件新增一个用户名和密码
htpasswd -D /usr/local/nginx/conf/htpasswd username   # 从指定文件删除一个用户信息
htpasswd -v /usr/local/nginx/conf/htpasswd username   # 验证用户名和密码是否正确
1
2
3
4根据需求指定生成路径的位置。
我们创建一个 kele 的用户名,密码是 123456

可以查看生成的文件内容
vim /usr/local/nginx/conf/htpasswd1
浏览器访问
192.168.199.27/download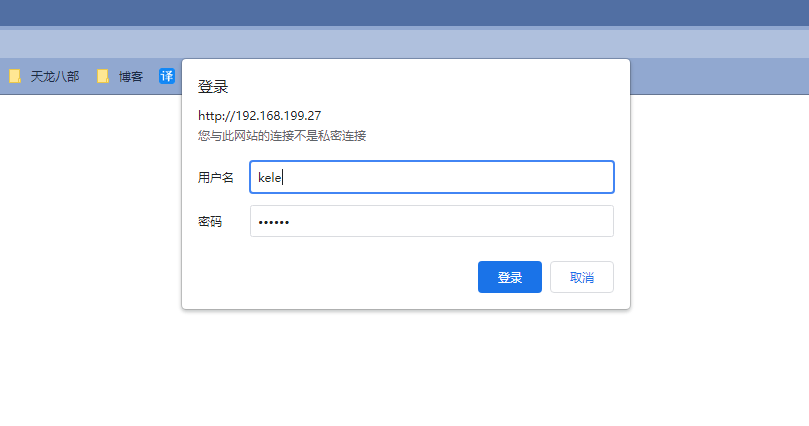
上述方式虽然能实现用户名和密码的验证,但是大家也看到了,所有的用户名和密码信息都记录在文件里面,如果用户量过大的话,这种方式就显得有点麻烦了,这时候我们就得通过后台业务代码来进行用户权限的校验了。